This concept looks more like Sliding an Activity than any drawer behaviour mentioned hah! Either way, it's still a cool concept i can explain and share. Read through and learn how to implement it.
 |
| Video thumbnail |
Create a new project, again name it anything you want. I named mine 'drawer behaviour' and added an icon..
Before we continue we need to get the library for this concept to work. There are two ways you can get it:
1: Direct file import
Download this Library (mediafire link) then unzip it to .sketchware > libs > local libs (the zip file has no password). This way you'll have imported the library file directly to the Project.
2: downloading from Dependancy
Open your project and go to 'local library' and click on the download button in the top right corner
You would see this dialog below
Paste this dependancy 'com.yarolegovich:sliding-root-nav:1.1.1' and click Start. The library will start searching and once found will be downloaded. Tick on it and exit the library manager.
Next step you want to do is turn on AppCompact for the drawer effect to work. The added multidex classes will be compatible with the dependancy version were are using above.
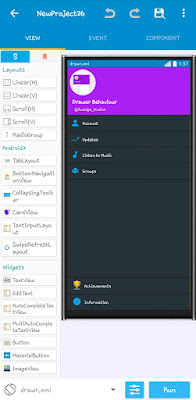
Now create a new customView and name it drawr. We'll use this same name in the sliding root nav codes below this.
This customView we created will be our new Drawer that our activity will slide over. You can get to designing it if you like. If not search for amazing designs online or use mine below..
You can get it in the Project i provided below.
Once your done, head back to MainActivity and go to Oncreate. From there you can paste this code below :
new SlidingRootNavBuilder(this) .withMenuLayout(R.layout.drawr)
.withToolbarMenuToggle(_toolbar)
.withMenuOpened(true)
.withContentClickableWhenMenuOpened(true)
.withDragDistance((int)180)
.withRootViewScale((float)0.7f)
.withRootViewElevation(10)
.inject();
//both the drag distance and view scale are set to the library's default value.
Can you see the 'drawr' part? That is the name of the customView we created above. You can change it similarly to what you want to name your Drawer.
- 'withToolbarMenuToggle(_toolbar)' let's you open the slide using the toolbar. It's usually a clickable three-lined widget at the top left corner.
- 'withMenuOpened(true)' opens the slide automatically once you start your application or activity. Change the words inside brackets to 'false' if you don't want this to happen.
- 'withContentClickableWhenMenuOpened(true)' will let you or any user click on the widgets like buttons or imageviews that are on the slide (activity). Change to false to do otherwise.
- the code 'withDragDistance((int)180)' determines how long the slide can be dragged to the right.
The longer the dp, the more fun it becomes dragging. The default == 180dp.
- 'withRootViewScale((float)0.7f)' gives you the power to set the slide's size to whatever you want. Starting with the largest size (1.0f) to the smallest (0.10f), you can decide how large you want your slider to be. The default == 0.65f;
- Finally you can also set elevation to your slider using 'withRootViewElevation(10)'. Change the value in the brackets to raise the slide to whatever height you want.
Exit Oncreate and compile your project.
Sliding Activity!!!
If you want to download this Project, use this > Link. It contains additional features such as the drawer Customizations and a free Design.
Adios Nas.


3 Comments
It works great
ReplyDeleteMe too
ReplyDeleteThanks alot and welcome back sir
ReplyDelete